

Yellowed and cloudy headlights are not just an aesthetic issue — it’s also a safety concern.
Many people ignore this because the headlights still “work.” However, the light they emit is often far from their real potential. When driving at night, poor lighting can determine whether you notice an obstacle in time.
In this article, we will cover:
- Why headlights turn yellow;
- Why restoration is the right solution;
- How to do it step by step;
- How to maintain the result for a long time
Why Do Headlights Turn Yellow?
Modern car headlights are not made of real glass. They are made of plastic.
The problem is that plastic itself is not resistant to UV rays. That’s why it is coated with a protective clear layer at the factory.
This is the layer that deteriorates over time.
What damages it:
- UV rays – the coating fades and starts to yellow;
- Temperature fluctuations – plastic expands and contracts, causing micro-cracks;
- Road environment – salt, sand, small stones, insects, and chemicals constantly wear down the surface.
Once the protective layer wears off, the exposed plastic begins to oxidize:
- Yellowing appears;
- The surface becomes matte;
- Light starts scattering instead of projecting forward.
The result — instead of 60 meters of visibility, you may only get around 20.
Why polishing Is Necessary?
Severely cloudy headlights can reduce light output by up to 70%.
This means:
- Less of the road is visible;
- Reaction time decreases;
- Risk increases at night
Additional consequences:
- You may fail technical inspection
- The car looks older than it is
- Resale value drops
The cost of new headlights can be shocking, while restoration is significantly cheaper.
Preparation Methods: What’s the Difference?
The biggest mistake is starting to polish an unprepared surface.
The sanding stage can be done wet or dry.
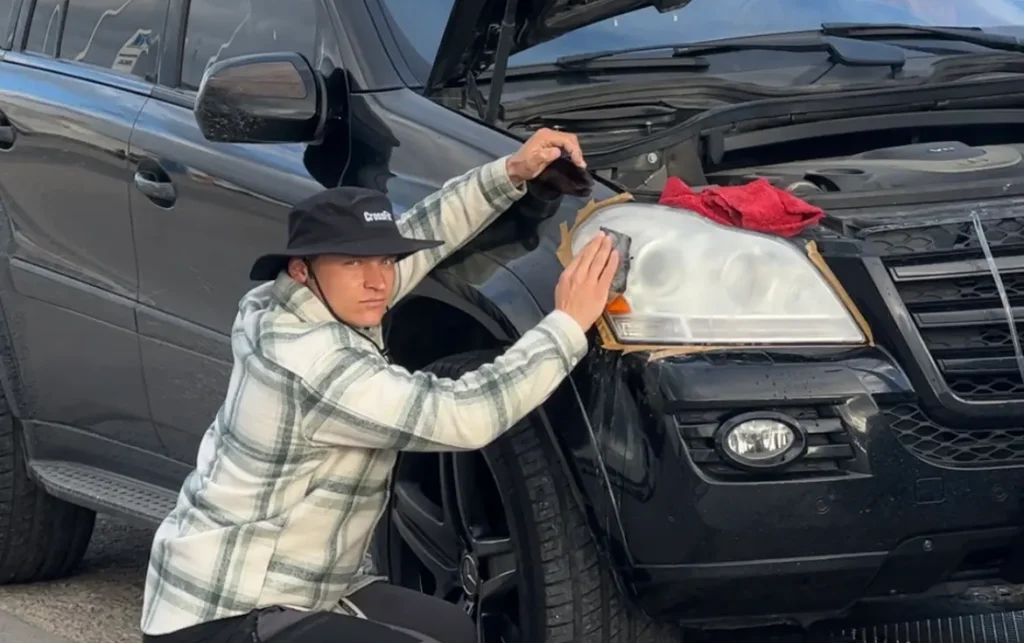
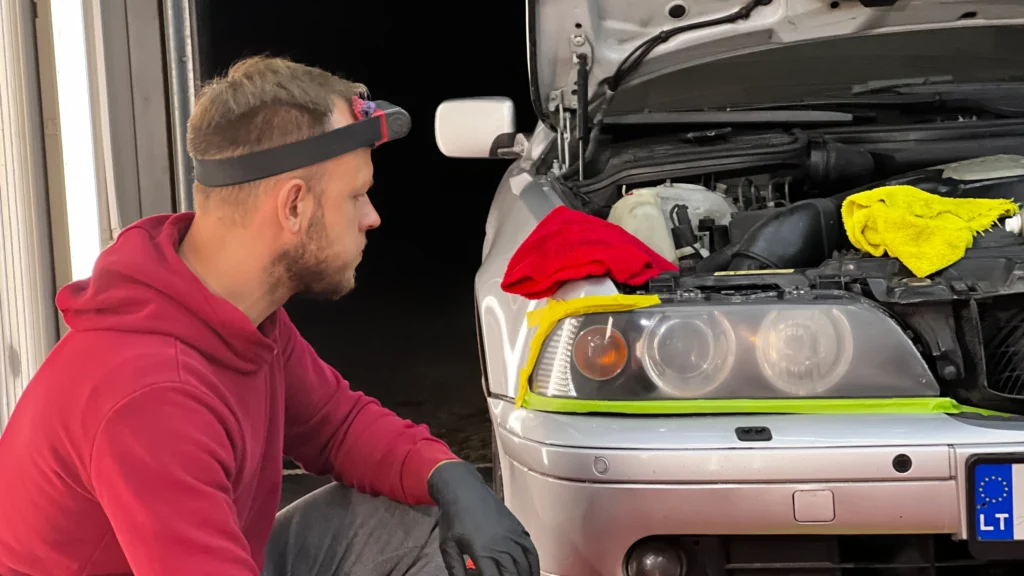
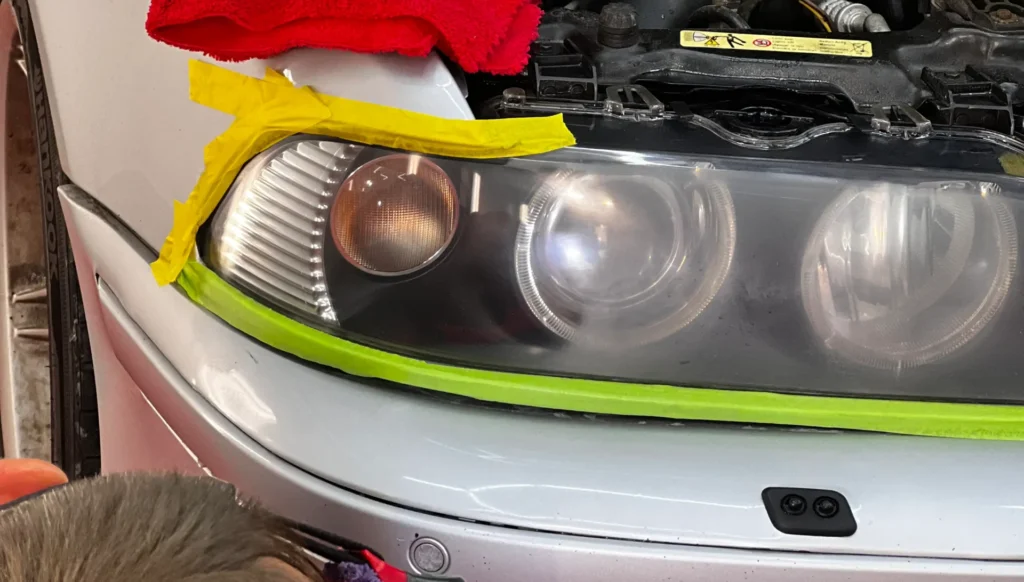
When working dry with an orbital sander, it is recommended to use a respirator, as clear coat and plastic dust are generated, which is harmful to health. It is also easy to damage surrounding edges, trims, and rubber parts, so proper masking with tape is essential.
Wet sanding by hand is safer — no dust, and it’s easier to see unworked areas.
Preparation: Step by Step
- Thoroughly wash the headlights to remove dirt, gravel, and insect residue;
- Dry the surface;
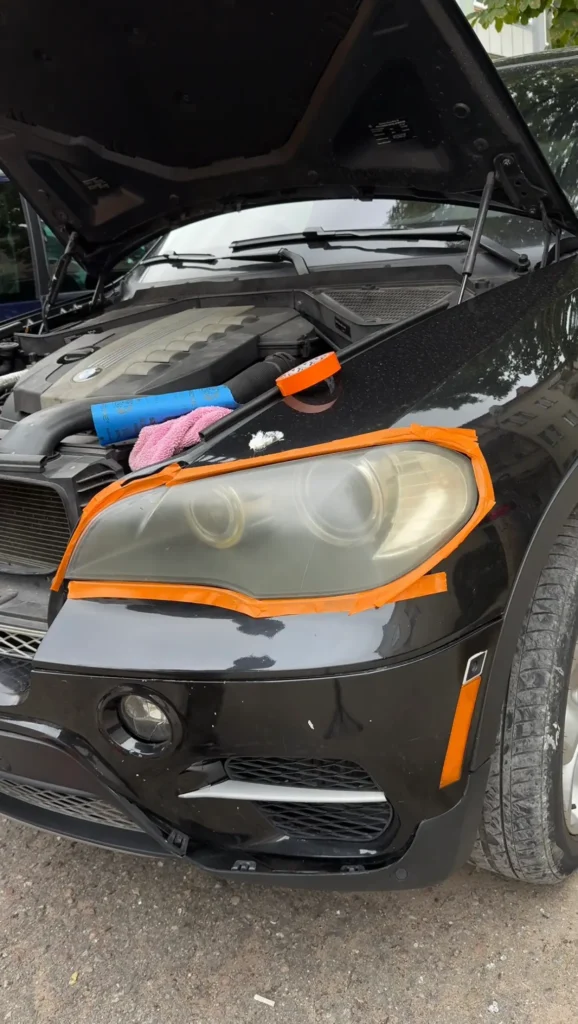
- Protect surrounding painted areas and rubber with masking tape;
- Assess the level of damage;
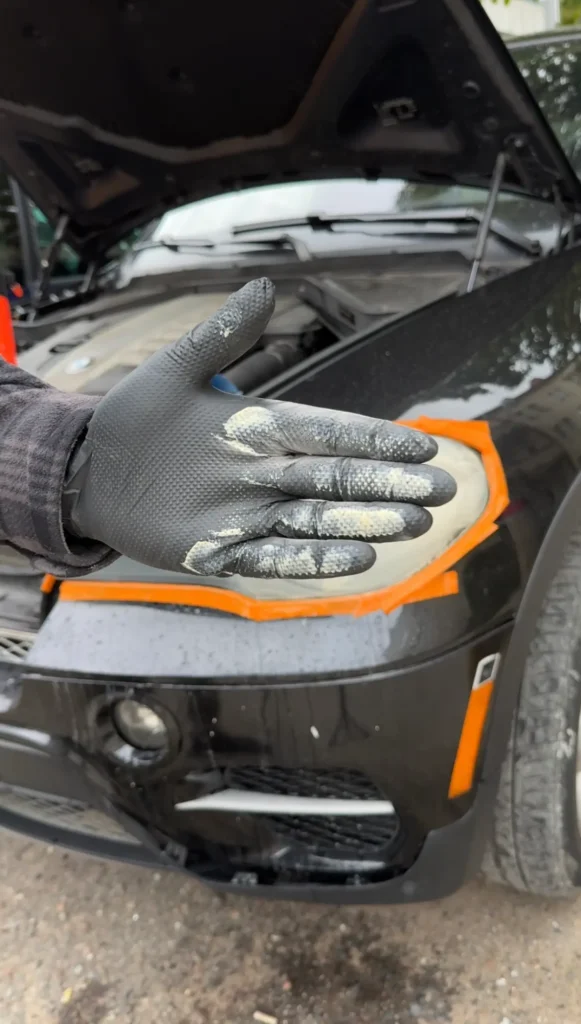
- Sand off the yellowed layer using a machine or by hand;
- Dry or wipe the headlights clean;
- Reapply masking tape if necessary, moisture may cause it to loosen
What You’ll Need:

- Sandpaper (grits: 400, 600, 800, 1000, 1200, 1500, 2000, 2500, 3000);
- Polishing compounds (cutting to finishing);
- Masking tape;
- Spray bottle with water;
- Microfiber cloths;
- Polishing machine (rotary or DA)
Important note: sandpaper grit depends on the condition of the headlights.
If the entire headlight is already yellow and the original protective coating is gone, it is recommended to start around 1500 grit.
If only part of the headlight is yellowed and the lower section is still clear, a coarser grit like 800 may be needed.
If the headlight is patchy and unevenly yellowed, you will need to remove all remaining coating — this may require starting as low as 400 grit.
Important: once you choose your starting grit, remember that sanding creates scratches. To remove them properly, you must gradually move through finer grits listed above. Work carefully.
Plastic is softer than clear coat, so each grit leaves scratches of a certain depth. To remove them, you must sand slightly longer than with the previous grit.
For example, after sanding with 400 grit and moving to 600: 600 is finer, so to remove 400 grit scratches, you must evenly cover the entire surface without missing edges. Repeat this process through all grits: 800 → 1000 → 1200 or 1500 → 2000 → 2500 → and finally 3000.

A common question: is 3000 really necessary?
It may seem insignificant, but in practice it greatly improves the final polishing result.
Wet sanding is most commonly used — keep the surface constantly wet using a spray bottle.
At first, sanding with coarse grits produces a lot of milky residue in the water. As you move to finer grits, the water becomes clearer and the headlight starts regaining transparency.
Sand in straight motions (horizontal and vertical).
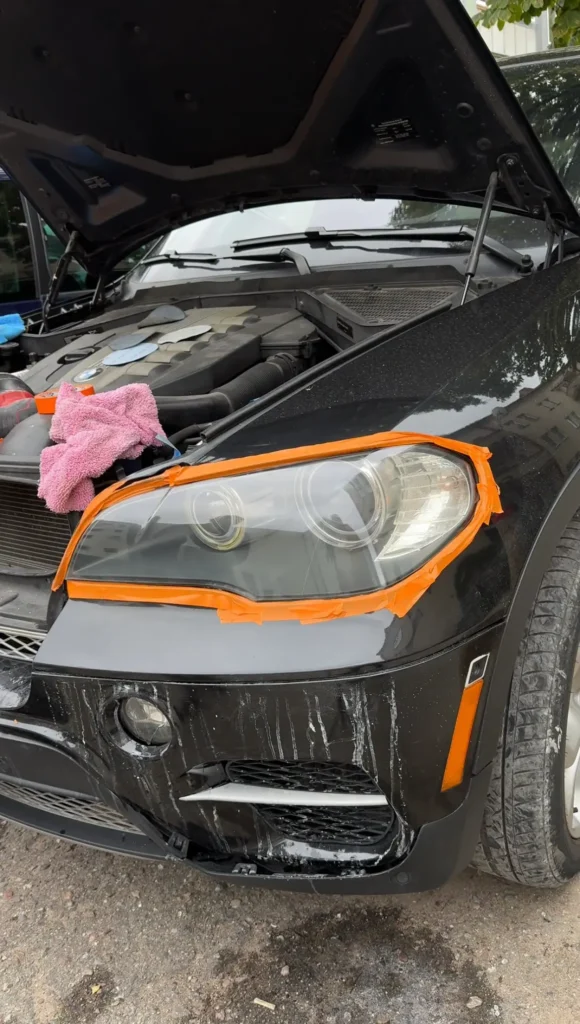
After this stage, the surface should be evenly matte with no yellowing.
Polishing
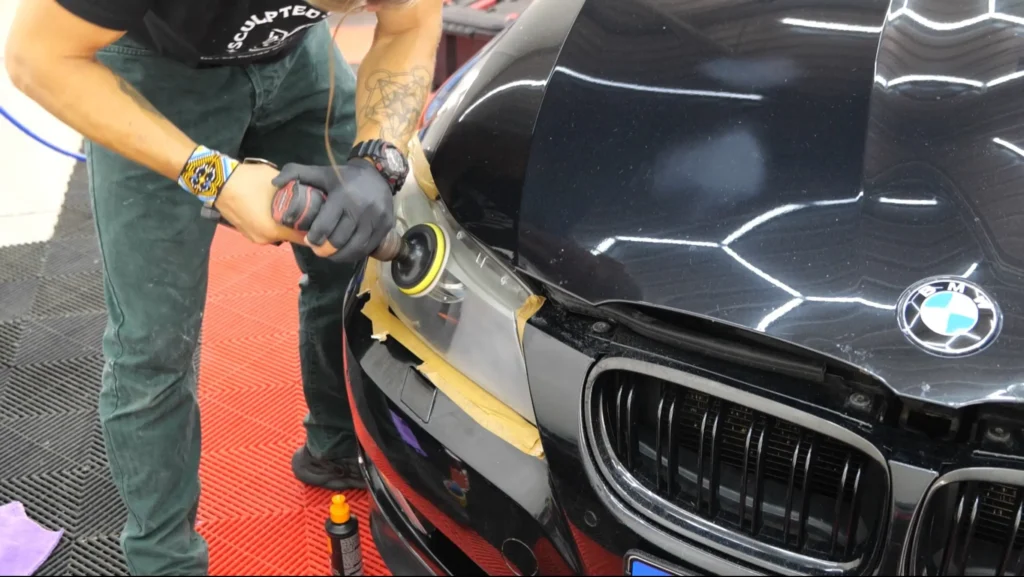
The goal is to remove sanding scratches and restore clarity.
Stage 1: Cutting (coarse compound, heavy pad or wool pad)
- Apply a small amount of compound to the pad;
- Polish using a rotary or DA polisher (medium speed);
- Work until the surface becomes clear
Wipe off residue, inspect, and repeat if necessary.
Stage 2: Finishing Polish
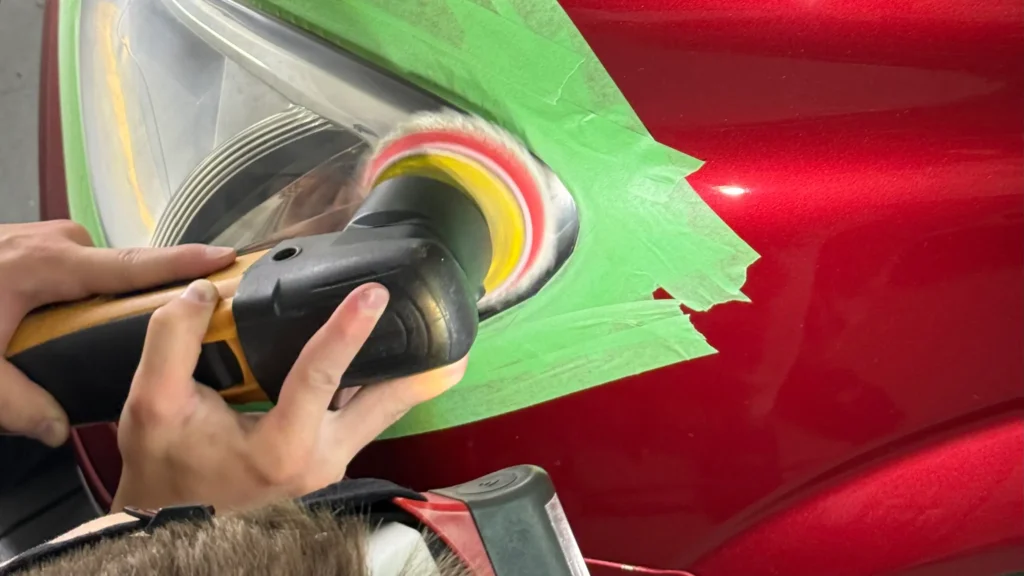
Use a finer compound and a softer pad to:
- Remove micro-scratches;
- Achieve maximum clarity and gloss
There is also a popular time-saving method using a device often called an “Aladdin lamp” or “magic cup.”
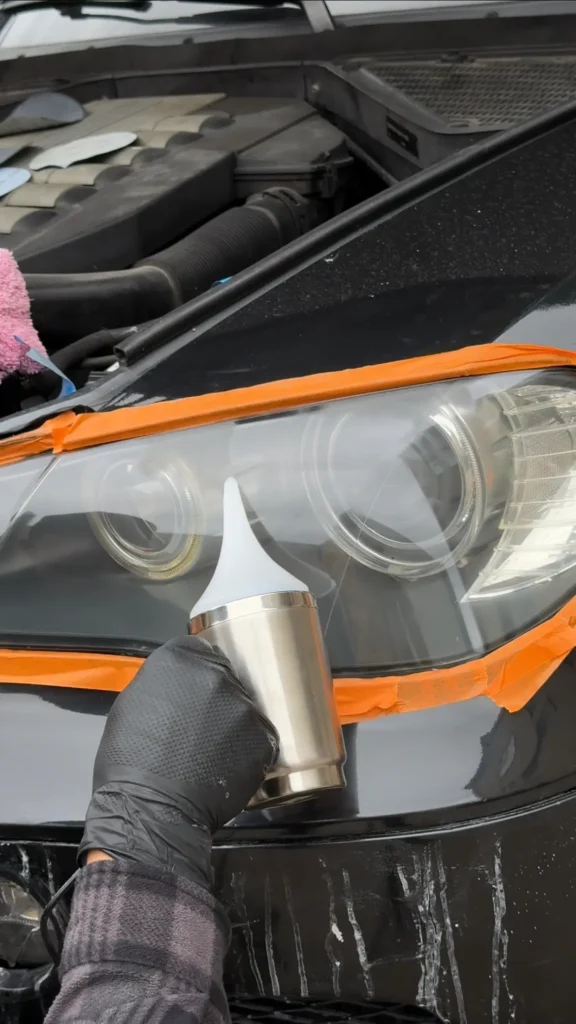
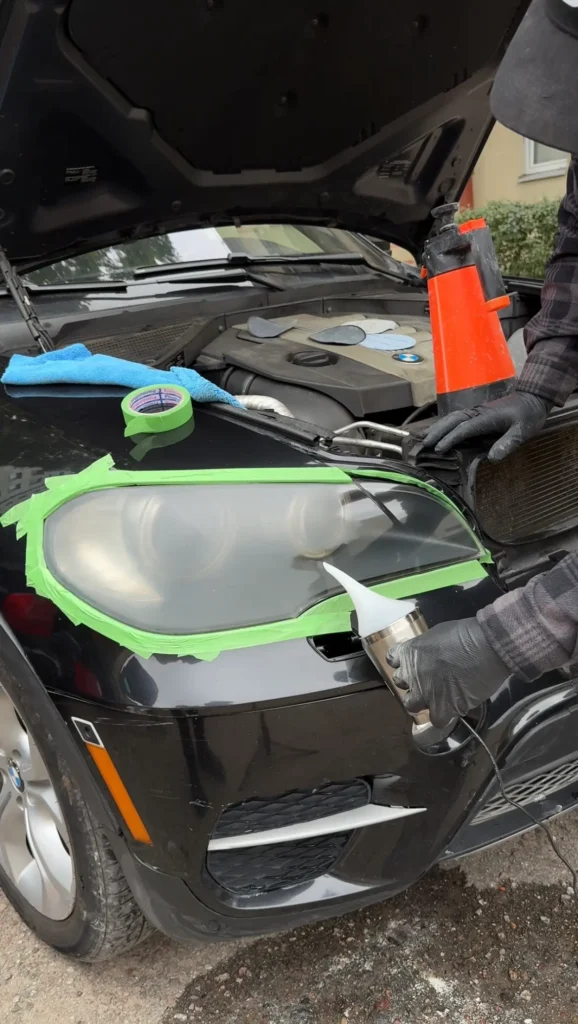
This is an electric heating cup filled with an acetone-based liquid. As it heats up, vapors rise through a narrow nozzle and melt the sanded surface, smoothing it and restoring clarity.
Important: all old clear coat must be fully removed beforehand, otherwise sanding marks will remain.
Never touch the cup to the headlight — it can leave marks requiring re-sanding.
The chemical reaction works quickly and gives great results, but the fumes are harmful — always use proper protection and make sure the work area is well ventilated.
Even after this method, protection is still necessary.
Protection
If nothing is done, headlights may start yellowing again within six months.
To maintain clarity after restoration, there are several options:
Option 1: UV Protective Clear Coat
- Protection: 5–10 years or more
Best for those who has proper conditions for painting. Often headlights are taken to professionals, as sanding is required anyway before applying clear coat to bond with the surface.
Option 2: PPF (Paint Protection Film)
- Protection: up to 5 years;
- UV protection;
- Protection against stone chips
Option 3: Ceramic Coating
- Protection: 2–5 years;
- UV protection;
- Hydrophobic effect
Summary
- Headlights turn yellow due to UV exposure, environmental wear, and degraded protective coating;
- Proper preparation determines speed and quality of polishing;
- Polishing and clear coat reapply restores clarity and gloss;
- Protection is essential for long-lasting results
Headlight restoration takes just a few hours, but the results are clear:
- Safer driving;
- Improves vehicle appearance
If done correctly, you won’t need to revisit this issue for years.